
User:Dhatfield/Image to Vector Tutorial
Why do it?[edit]
- A vector or SVG image scales perfectly.
- A vector image can be edited easily, for example for translation.
- For many types of images a vector image looks 'cleaner' and more professional than an 'ordinary' or raster image.
- SVG is the way of the future.
-
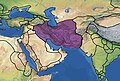
 Raster image
 -
 Vector borders - all countries can be individually colour-coded
 -
 Vector-based image


What this tutorial covers[edit]
This tutorial covers how to convert an image (also called a raster image or just raster) into a vector image. The lazy man's way is to go to Wikipedia:Graphic_Lab/Images_to_improve and drop in a request, but that lacks style, and you don't increase your skill base. So, it's better to do it yourself.
What you shouln't convert to SVG[edit]
Vector images are easier to generate if there are a limited number of colours in the image, because each colour requires treatment as a separate layer. The example I use has 10 layers, but that's about the limit for my patience and the speed of my computer (graphics editing is RAM intensive, 2GB recommended). Vector is also not good for small scale details because of the number of nodes in the path (see below), but a little bit of detail in the image (like on a flag) is perfectly manageable. SVG format is generally not good for photos. SVG supports smooth gradients of colour, but that makes things very complex for image to vector conversions and I won't be covering gradients here.
New to this game?[edit]
You will probably benefit from taking a look at How to draw a diagram with Inkscape, SVG and GIMP.
How to do the conversion[edit]
- Open the image in Gimp. Use "Select regions with similar colours" to select part of the image that has the same colour. You will probably want to stick to the default "composite" selection mode to start with, select the others if you know what they mean. "Value" can be helpful, but may select more than you expect.
- Tip: dragging the pointer to the right while selecting a region includes more pixels (with preview) similar to the one you have chosen.
- Tip: After each selection zoom out if necessary and check that you haven't selected more than you expected and undo if necessary.
- You now have a selection that contains one of the colours you want in your new vector image (SVG).
- Use the "Color picker tool" to select the colour that this layer should be. This will not break your selection.
- Make a new layer and name it after the colour.
- Make sure you have the new layer selected and use the "Bucket fill tool" to fill up your selection with the new colour. Your new layer probably has a few stray pixels and rough edges that you should smooth out with the "Pencil" and "Eraser" tools.
- Tip: Select->Shrink and / or Select->Grow can be a great way to get rid of pesky stray pixels, but check your pixel shrink/grow size - they should normally be the same.
- If this is your first colour, skip the repeat step and follow the instructions to get a feel for how your pixels will come out as a path in Inkscape. This will (hopefully) convince you to be more careful with your colour layers.
- Repeat until you have each colour on a separate layer, with all of the borders nice and smooth and no stray pixels.
- Tip: You can use layering so that layers on top hide parts of layers below: in the example the light yellow goes on top on the medium yellow, goes on top of the dark yellow, so the dark yellow can be solid underneath the upper layers. This is highly recommended as it will make you path editing later much easier.
- Save each layer as a separate image with the name of the colour in the file name. Portable Network Graphic (.png) is best.
- Caution: Do not use JPEG! It will most likely lead to blood, sweat, tears, wailing and gnashing of teeth.
- Open up Inkscape.
- Add a layer called "Image".
- Go to File->Import and select your image.
- Use Path->Trace Bitmap to generate a path from your image and take a look. Update. Does it look okay? If yes, press okay, if no, change the threshold until you get the correct black on white picture. Press Okay to generate the path. Take a look at it in the main window. If it looks okay, proceed, if not, undo (Ctrl-Z), go to options and change them. On a high resolution (1000x2000) image I used Suppress speckles 5-25, Smooth corners (1.34) and Optimise paths 1. Experiment. You may have to go and edit your source image in Gimp to get what you want.
- Make a new layer with the name of the colour and move the path onto the new layer (See layer menu). Go to the imahe layer and delete it. You will re-use the image layer for your other colours.
- Check the nodes generated (Edit Path by Nodes - F2) and see how many your got. If it looks like too many (it probably will), try "Path->Simplify". The borders will shift a bit. Compare the before and after (Ctrl-Z, Ctrl-Y) to see if you can live with the change.
- Look at your nodes (F2) and edit them until your path is the correct shape (See the Inkscape help for editing nodes, or just select nodes and wiggle things and add and delete nodes until you figure it out). This may be slow and tricky at first so be patient and you will get there. Node editing is the critical SVG skill, so it's worth the time to get good at it.
- Go to your next colour layer until they are all done and fit together as required (remember some can go under others to avoid gaps. You will probably need to learn about layer visibility, order (visible top to bottom) and locking layers to do this.
- Tip: If you have a border (normally black) on your image leave all the nodes in it and put it on top. That way your other layers only have to 'paint between the lines', they don't have to be perfect.
- Put in any text you need and give it an appropriate font, size, etc. with Ctrl-Shift-T.
- Convert your text to a path with Path->Objects to Paths
- Save as .svg and you're done.
Assitance[edit]
If you have a problem or query, or suggestions to improve this guide, please talk. Happy converting. Dhatfield (talk) 09:38, 29 May 2008 (UTC)